Setting up an event on Kapwa takes about two minutes. Here is exactly what to expect.
Step 1: Create your account
Go to kapwa.social and click "Host an event." You can sign in with Google or create an account with your email. There is no credit card required.
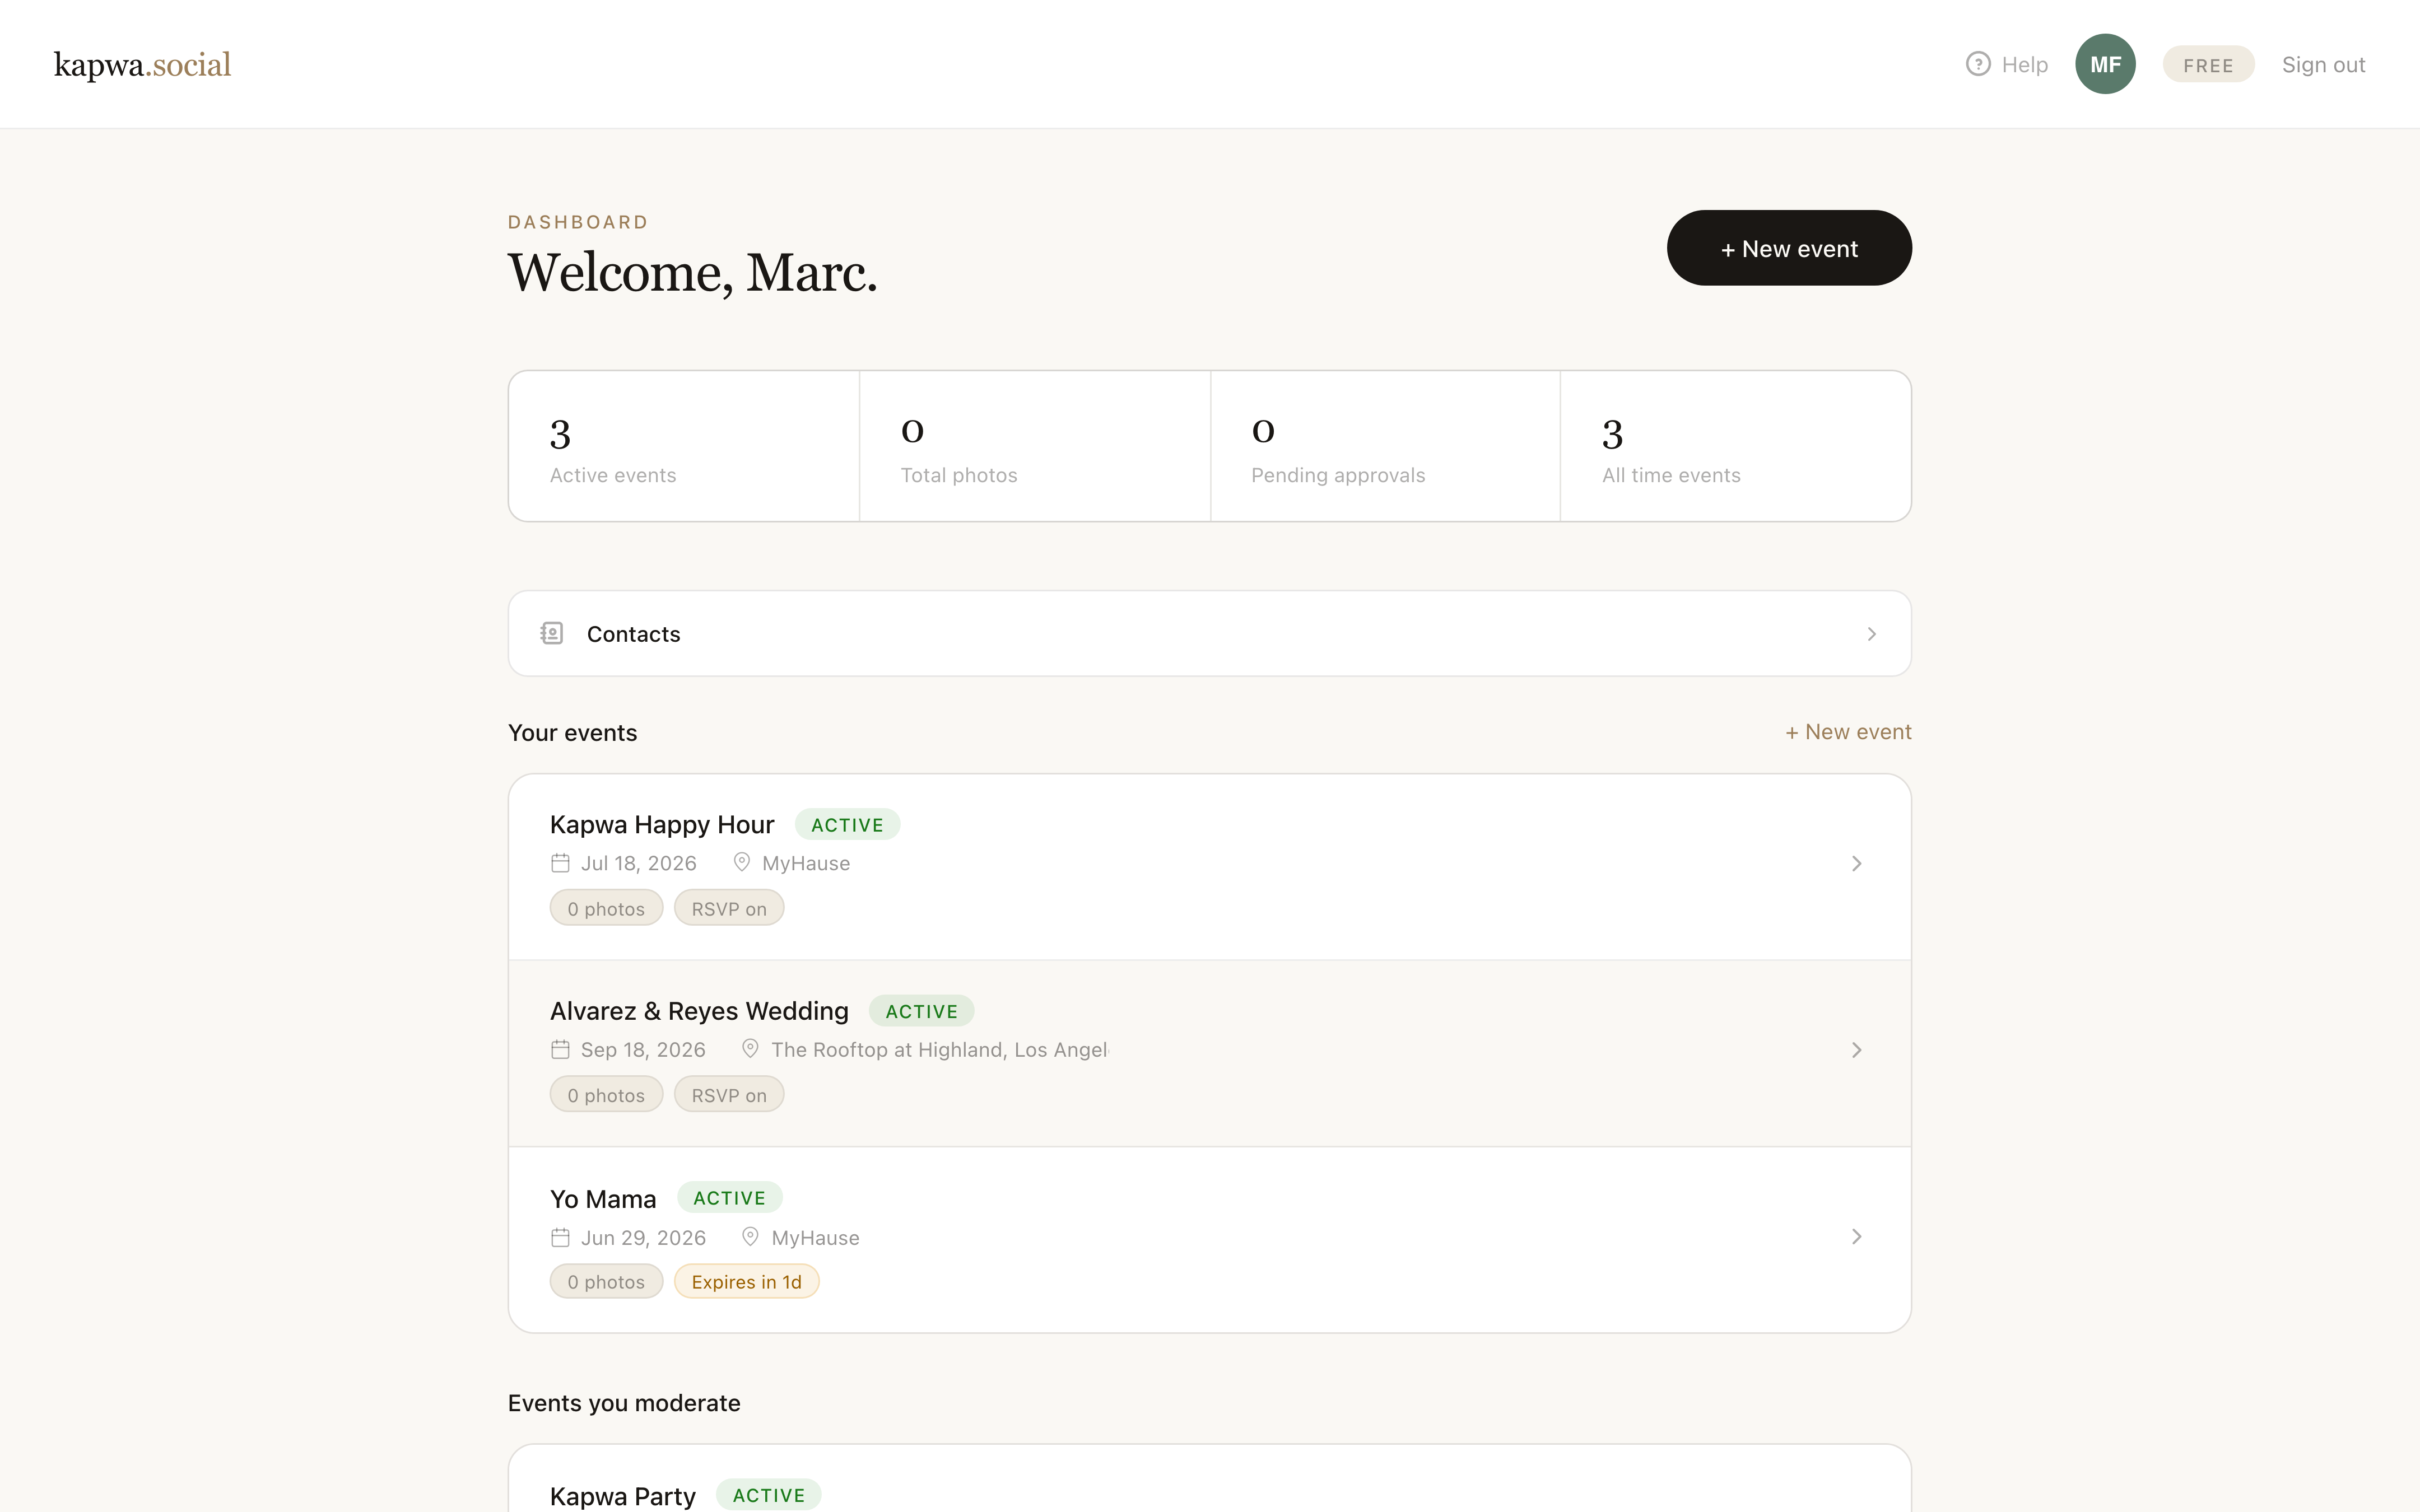
Once you are signed in, you will land on your dashboard. This is where all your events live.
Step 2: Fill in your event details
Click "Create event" to start a new event. You will be asked for:
- Event name -- what guests will see at the top of the invite
- Date and time -- shown on the invite and used for calendar links
- Location -- optional, included in the invite and the .ics download
- Event type -- helps Kapwa suggest the right default settings
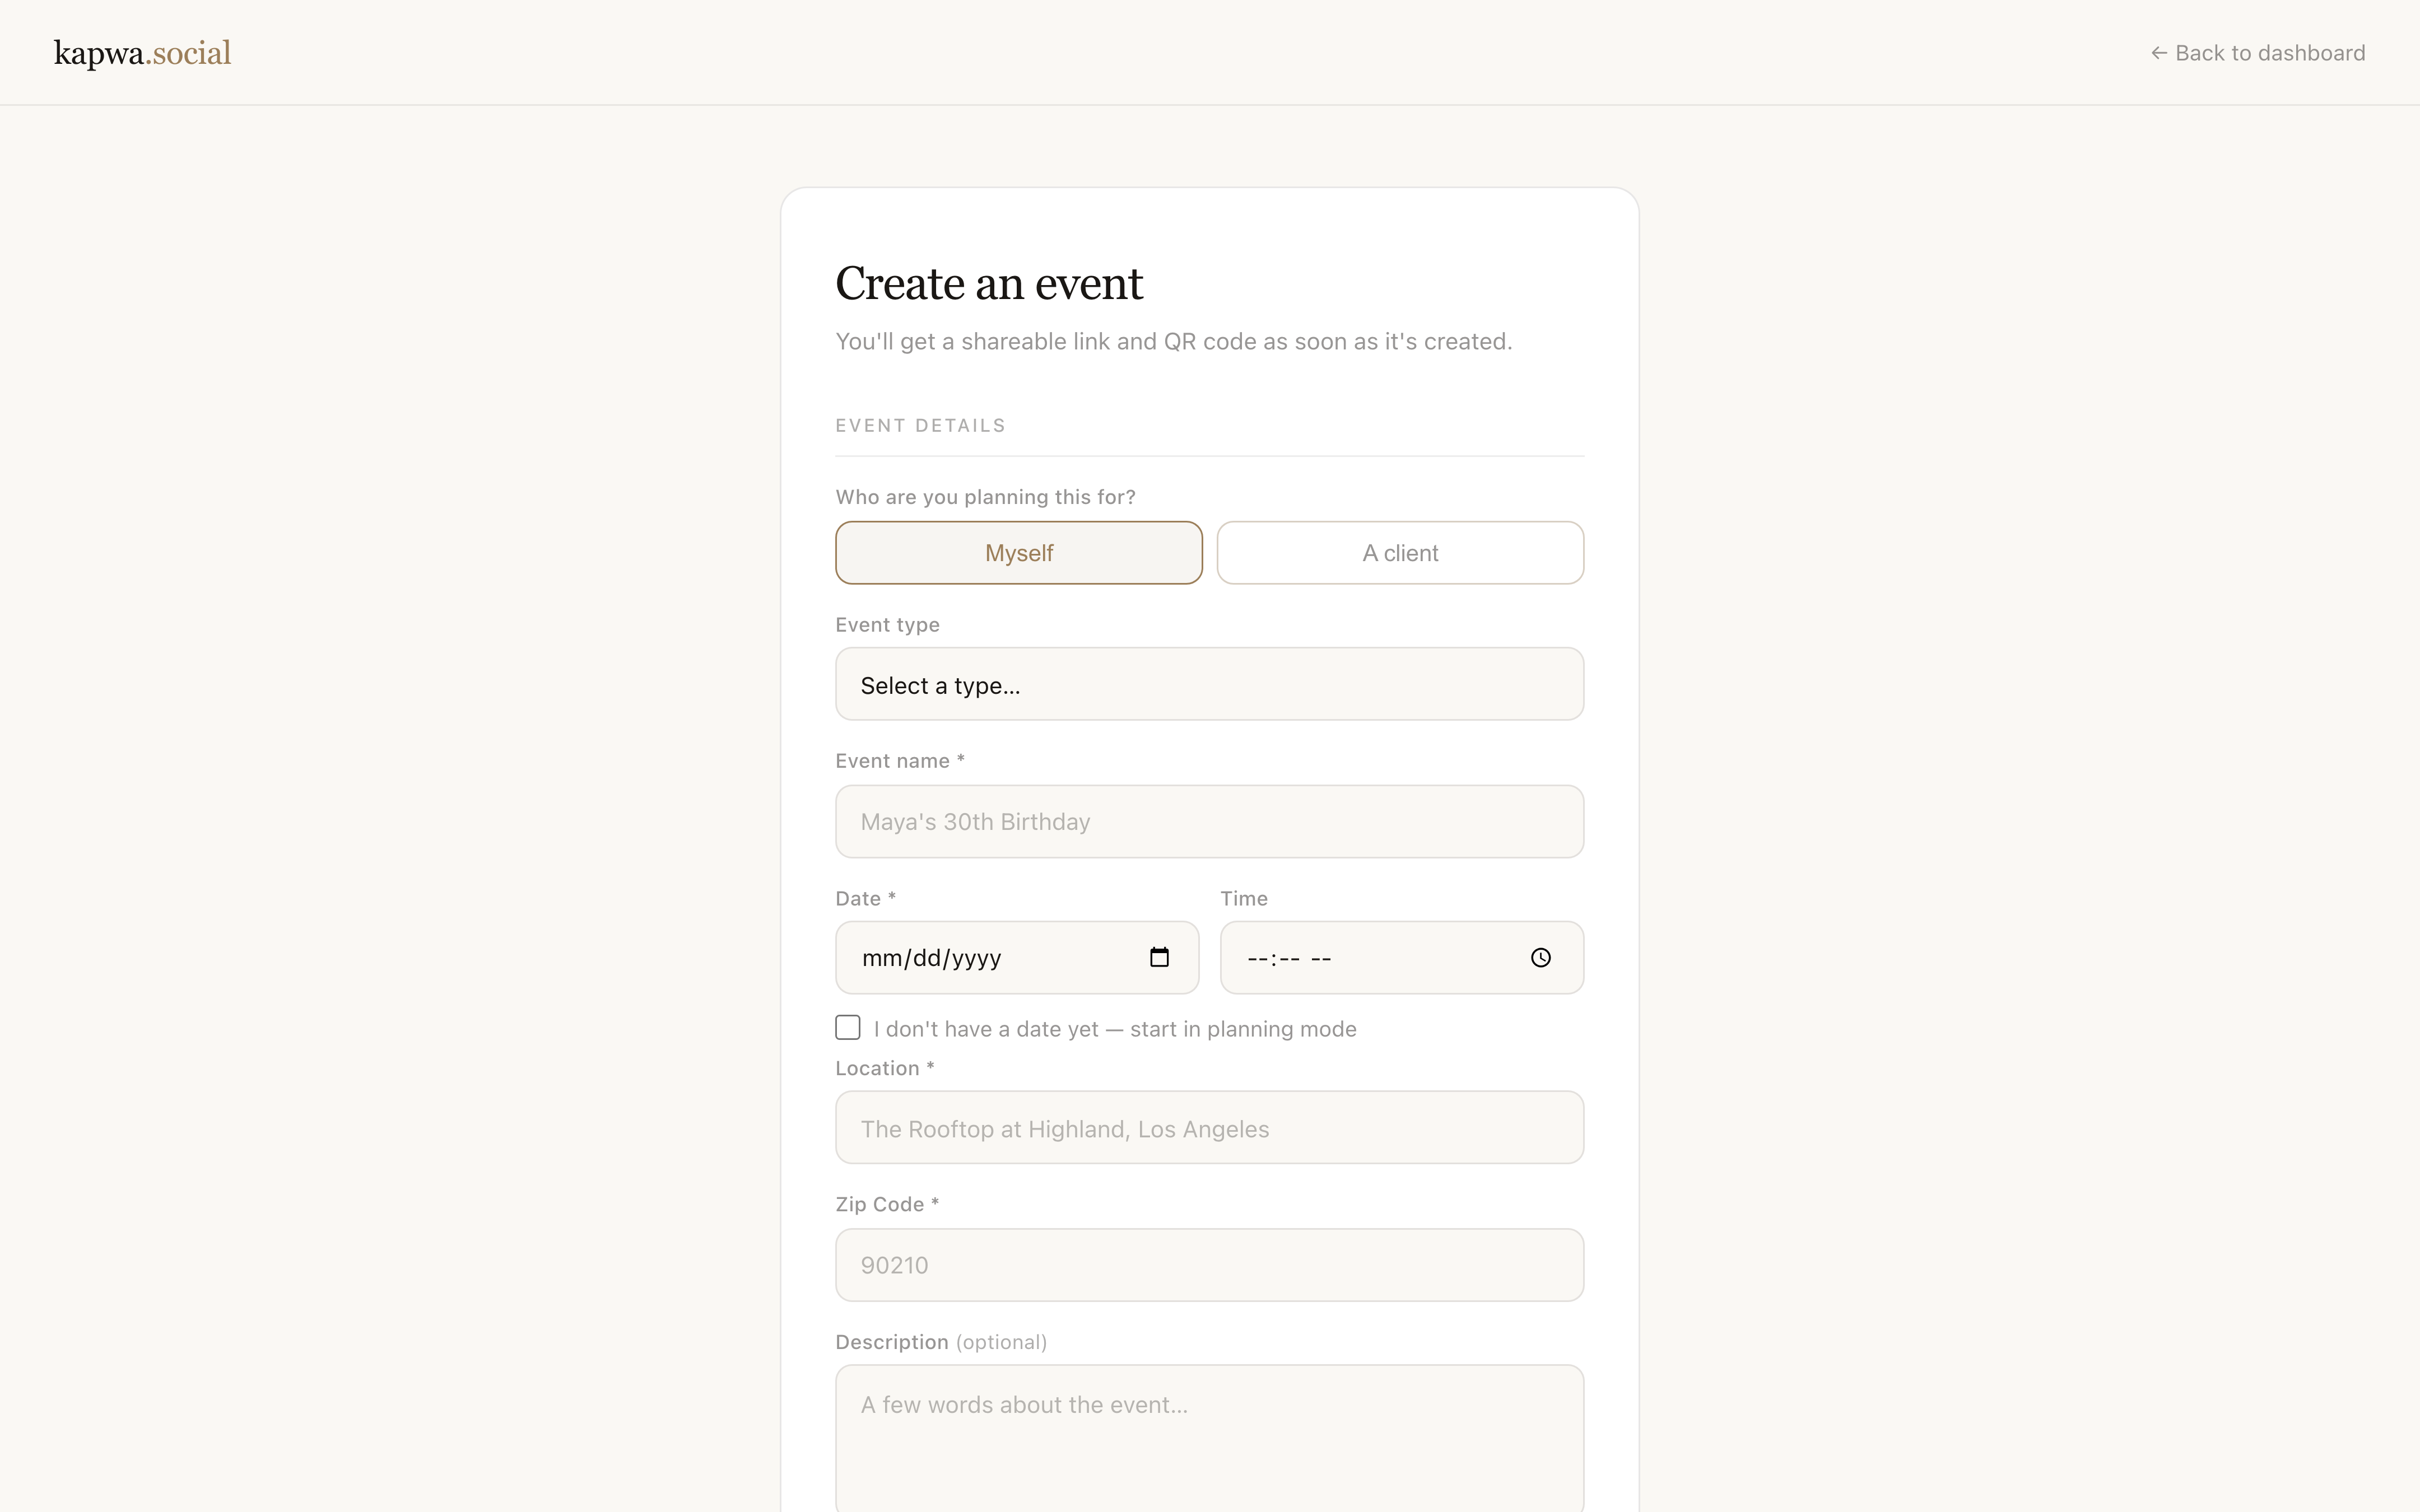
You do not need to fill everything in right now. You can save a draft and come back to it.
Step 3: Customize your invite
After saving the basics, you will land on your event overview page. From here you can:
- Upload a banner photo or use the invitation builder to design one
- Set your guest access level (public, invite-only, or approval required)
- Toggle on or off features like potluck, registry, and photo approvals
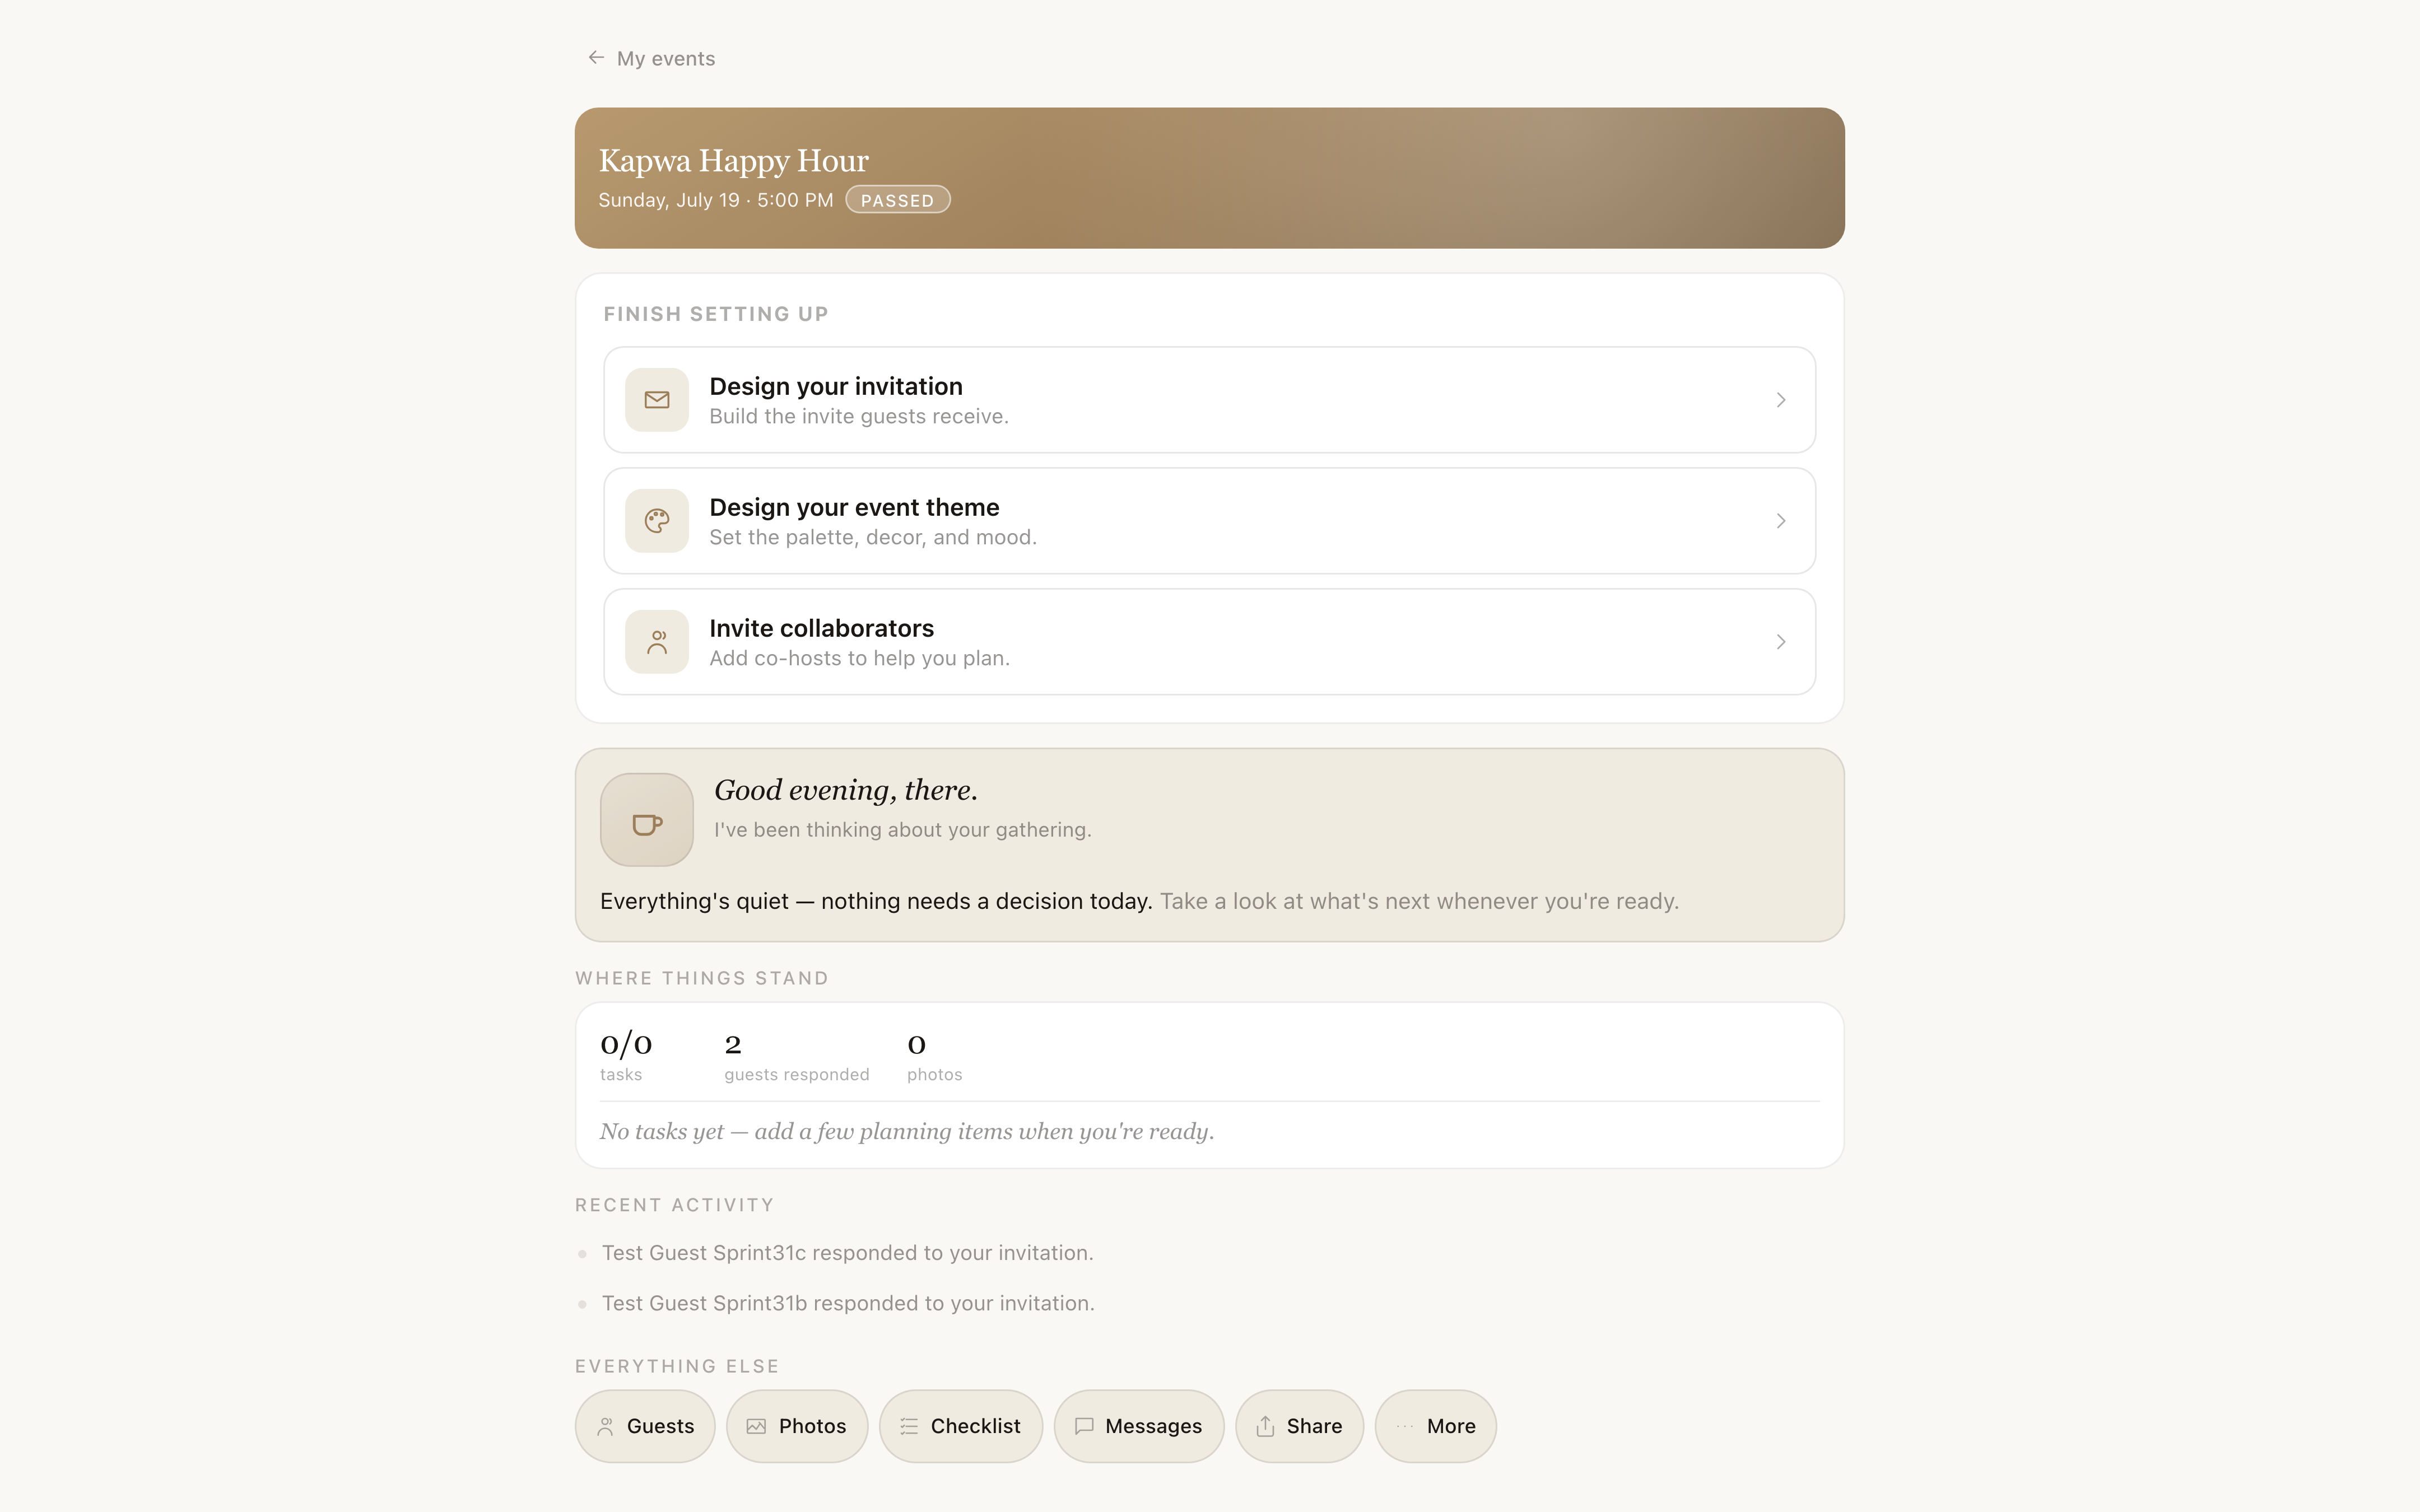
The "Share" button at the top gives you the guest link and a QR code. Both go to the same place.
Step 4: Share your link
Copy the guest link and drop it wherever your guests are -- a group chat, an email, a text. When guests open the link, they see the event page. No app download. No account required to RSVP or upload photos.
Your event link looks like:
kapwa.social/e/your-event-name
Step 5: Watch RSVPs come in
Back on your dashboard, your event card updates in real time as guests respond. You can see the headcount, who said yes, and any messages guests left.
If you have photo approvals turned on, any photo a guest uploads goes into a queue for you to review before it appears on the live wall.
What happens if you upgrade
Free events support photo sharing, RSVP, and potluck. Upgrading to Pro unlocks photo watermarking, custom slugs, and priority support. You can upgrade from the event settings page at any time.
Next step: Once your event is live, set up the invitation builder to give it a more personal look. See how to use the invitation builder for a full walkthrough.